Hello! Today I’m sharing the last printmaking project from my winter quarter class. If you read my last post on etching, you might have gathered that I did not immediately take to intaglio. Even though I was super excited about using the aquatint process for the this project, I unfortunately again had a hard time with the process, and was not thrilled with the results. However, I’m determined to document the ups and the downs from my classes on this blog, so that I can look back at where I started as I progress. On to the photos!

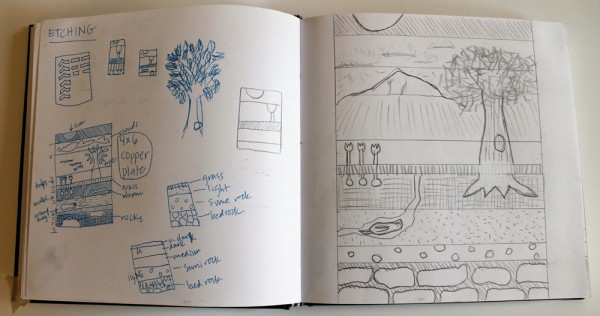
This project started as they all do, with a sketch in my little square notebook. I made this sketch before I knew what aquatint was, and my teacher suggested that I save it for this project. I had the idea to create a landscape in layers, and wanted to focus on what was underground as much as what was above ground. I imagined each layer would be a different value, with the underground layers being a little darker. The little groundhog didn’t make it into the final print.

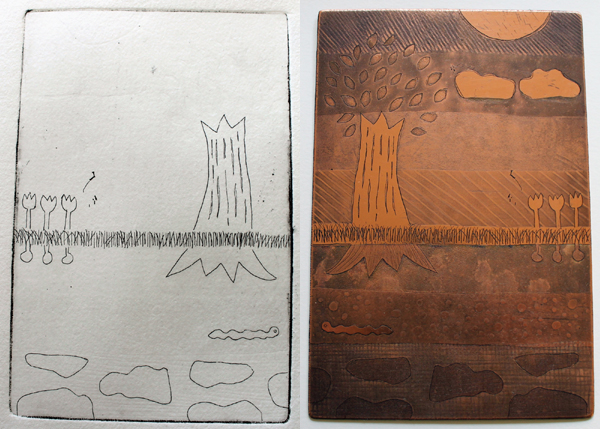
The first step was to create a basic line etching. The image above on the left is what the print looked like before I did any aquatint. And the plate on the right is the final. As you can see there is a lot more detail in that final plate, and it is all created with the aquatint process. Here is a link to a basic aquatint tutorial. The short explanation is that you coat the plate in rosin and melt it on a hot plate. Then you cover the parts of the plate that you don’t want to have any tone in hard ground, and then dip it in an acid bath. You keep building the values in increments by taking the plate out of the acid bath, and covering more of it with hard ground before dipping it back in. For this project I used Sharpie instead of hard ground, because I am more comfortable with markers. Typically hard ground is applied with a paintbrush, so you can also get some painterly effects with aquatint.

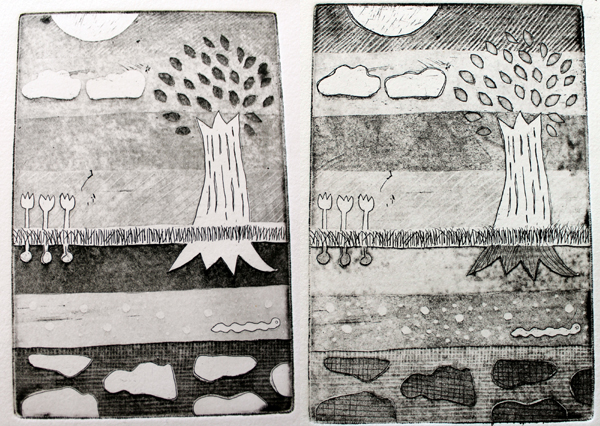
My first two prints are above. After I saw the first print (left), I wasn’t very happy with the values. The underground layers were too dark, and the other layers were too close in value. I repeated the aquatint process on the right, again not liking the values. Even my teacher didn’t understand what was happening with the plate at that point. It was a frustrating two day process of applying the aquatint and going through the acid bath process a total of three times.

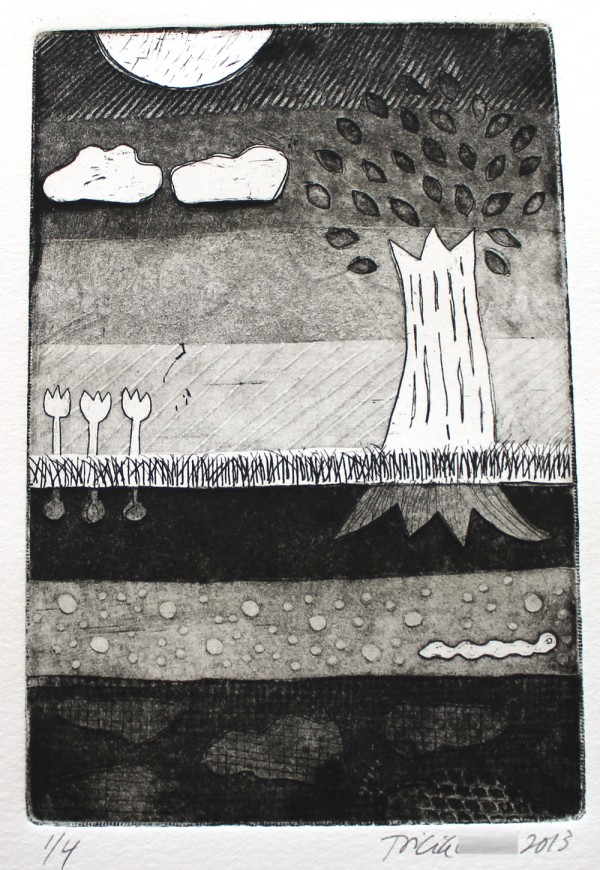
This is my final print. It’s not exactly how I pictured it would look like, but it’s closer. The values are overall a little too dark. I wanted this print to look light, happy and sunny. A lot of my cross hatching and little details are hard to see in the bottom section because it’s so dark. The leaves in the tree also get a little lost at the top because the values are too close. My favorite part of the print is the two little clouds, and the subtle shadows underneath. I’d like to play with that technique more and make an image with more clouds.
Overall, I’m still a little unsure if I’m going to continue working with the copper plates and intaglio process. I don’t want to give up too soon because I’m having a hard time with it, but I also know that there are a lot of other creative outlets I enjoy more and would like to spend my time on. I’m going to at least try a couple more projects, and then will evaluate whether I want to continue. My Printmaking II class starts next Saturday, and I’m excited to go to class the first day to see what we will be learning.
Comment 1